Get Started

Setting Up Your New Dr. Dish IC3

Welcome to the Dr. Dish Fam! Start shooting with these simple steps.
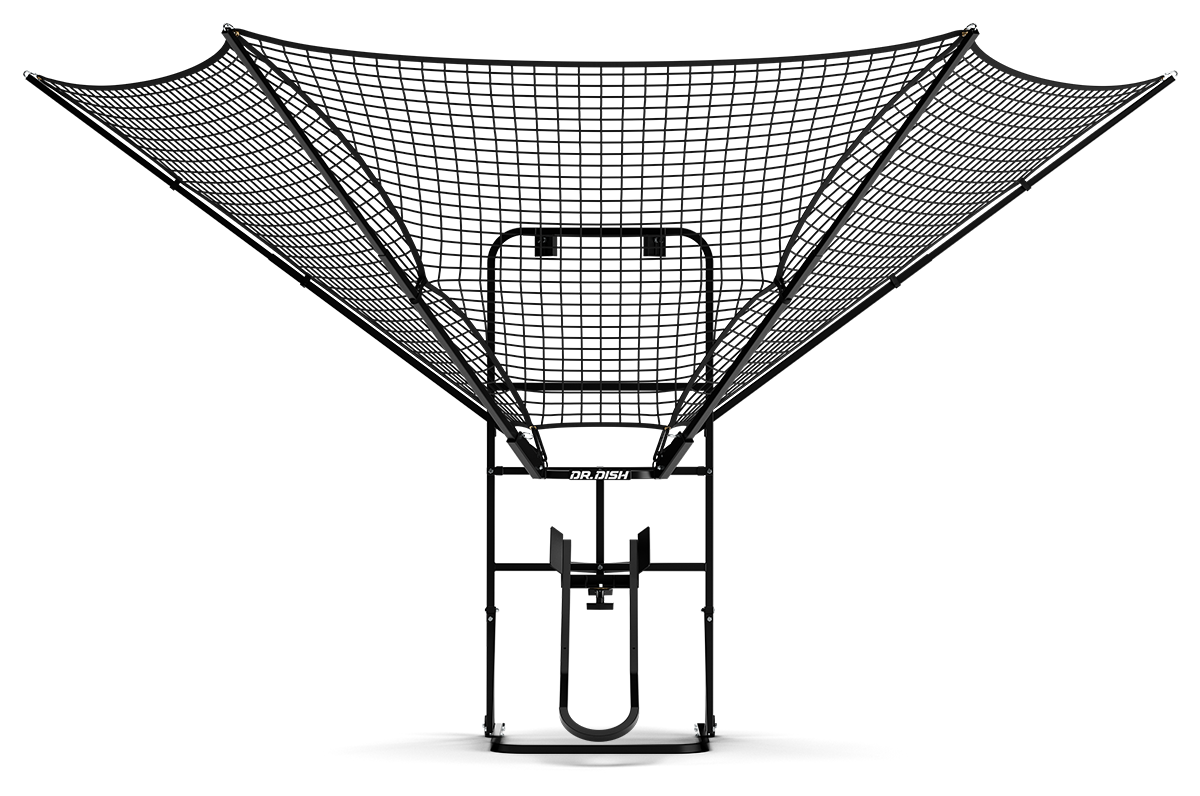
DrDishiC3ShotTrainer
Before We Begin
Unboxing Your IC3 Shot Trainer
Step 1
Lower Frame, Brace, and Gussets
  1. Fasten the Vertical Frame (10) to the Lower Frame pieces (23) using two M6x35 Bolts (9). Secure with Lock Nuts (8). 
  2. Fasten the Gussets (22) to the inside of the Vertical Frame (10) using two M6x30 Bolts (15). Secure with Lock Nuts (8).
  3. Fasten the Lower Brace (11) to the Lower Frame (23) using two M6x45 Bolts (14). Secure with Lock Nuts (8). Then, fasten the Gussets (22) to the outside of the Lower Brace (11) using two M6x30 Bolts (15). Secure with Lock Nuts (8).
Step 2
Horizontal Frame & Rim Rests
  1. Insert the Horizontal Frame (1) inside of Vertical Frame (10). Rotate the Horizontal Frame until the holes line up with the holes in the Vertical Frame. 
  2. Fasten the Horizontal Frame (1) to the Vertical Frame (10) using two M6x35 Bolts (9). Secure with Lock Nuts (8).
  3. Fasten both Rim Rests (18) to Vertical Frame (10) using four M6x25 Bolts (13). Secure with Lock Nuts (8).
Step 3
L-Bracket

1. Fasten the L-Bracket (12) to the Vertical Frame (10) using two M6x45 Bolts (14). Secure with Lock Nuts (8).

Step 4
Net Poles  
  1. Fasten the front Net Poles (16) to Horizontal Frame (1) using two M6x35 Bolts (9). Secure with Lock Nut (8). Do not fasten snug. Net poles must be able to pivot for storage.
  2. Fasten rear Net Poles (16) to Horizontal Frame (1) using two M6x30 Bolts (15). Secure with a Lock Nut (8). Do not fasten snug. Net poles must be able to pivot for storage.
Step 5
Ball Ramp
  1. Install the Ball Ramp (19) through the hole in the L-Bracket (12) using a Rubber Washer (4) between them. Tighten down using Female T-Handle (5).
Step 6
attach Net
  1. Lay out the Net (3) on a flat surface with the black ribbon seam facing down. 
  2. With the poles fully extended, pick up the net and place it on the interior of the frame. Match the corners of the net with the extended poles. 
  3. Starting on one end, insert the Carabiner (17) to the Net Pole (16) hole at the very top, then thread through the grommet holes in the Net (3). Twist the Carabiner nut to close. Repeat on the other three poles. Carabiner nut should face up.
  4. Position the two front Net Poles (16) down tight, and use the Ball Detent Pin (7) to secure poles.
Step 7
Velcro straps
  1. Loop the Long Velcro (25) to the bottom of the four D corner rings on the Horizontal Frame (1), and attach to the bottom of the net. 
  2. Loop the two Short Velcro (24) 11 squares up from the bottom on the center net panel. Velcro can be loose, does not have to be tight. 
  3. Loop the Short Velcro (24) 12 squares up from the bottom on the left and right side. 
  4. Loop the Short Velcro (24) 13 squares down from the top on the left and right side.

And just like that, your IC3 is assembled! To install it on the hoop for first use, check out this video and subscribe to our YouTube channel for drill ideas. 

REGISTER YOUR IC3
Activate Your Warranty

Complete the form below to register your product and activate your warranty.

Access Free Training Tools

Join the #DRDISHFAM

Need More Help?

Online Support

Contact Support AND A MEMBER OF OUR TEAM WILL RESPOND WITHIN ONE BUSINESS DAY

Get Help

Call Us

CALL US AND GET ALL OF YOUR QUESTIONS ANSWERED BY A MEMBER OF OUR TEAM

1-952-873-2633

Product Manuals

Access our full library of owner's manuals and technical documentation

Access Product Manuals